How do I setup a security group in Stratus?
Follow these steps on how to setup a security group in Stratus.

- Log into the stratus web interface at https://stratus.msi.umn.edu
- On the landing page you should see “Access & Security” on the left hand menu. Click on it.

- Click on “Security Groups”

- Click on “Create Security Group”

- You will need to name your security group. You can type anything you want in the “Name” field, but it should describe what your rule does. In this example I am making a rule for remote desktop so I called it “Remote Desktop Demo”.

- Click “Create Security Group”

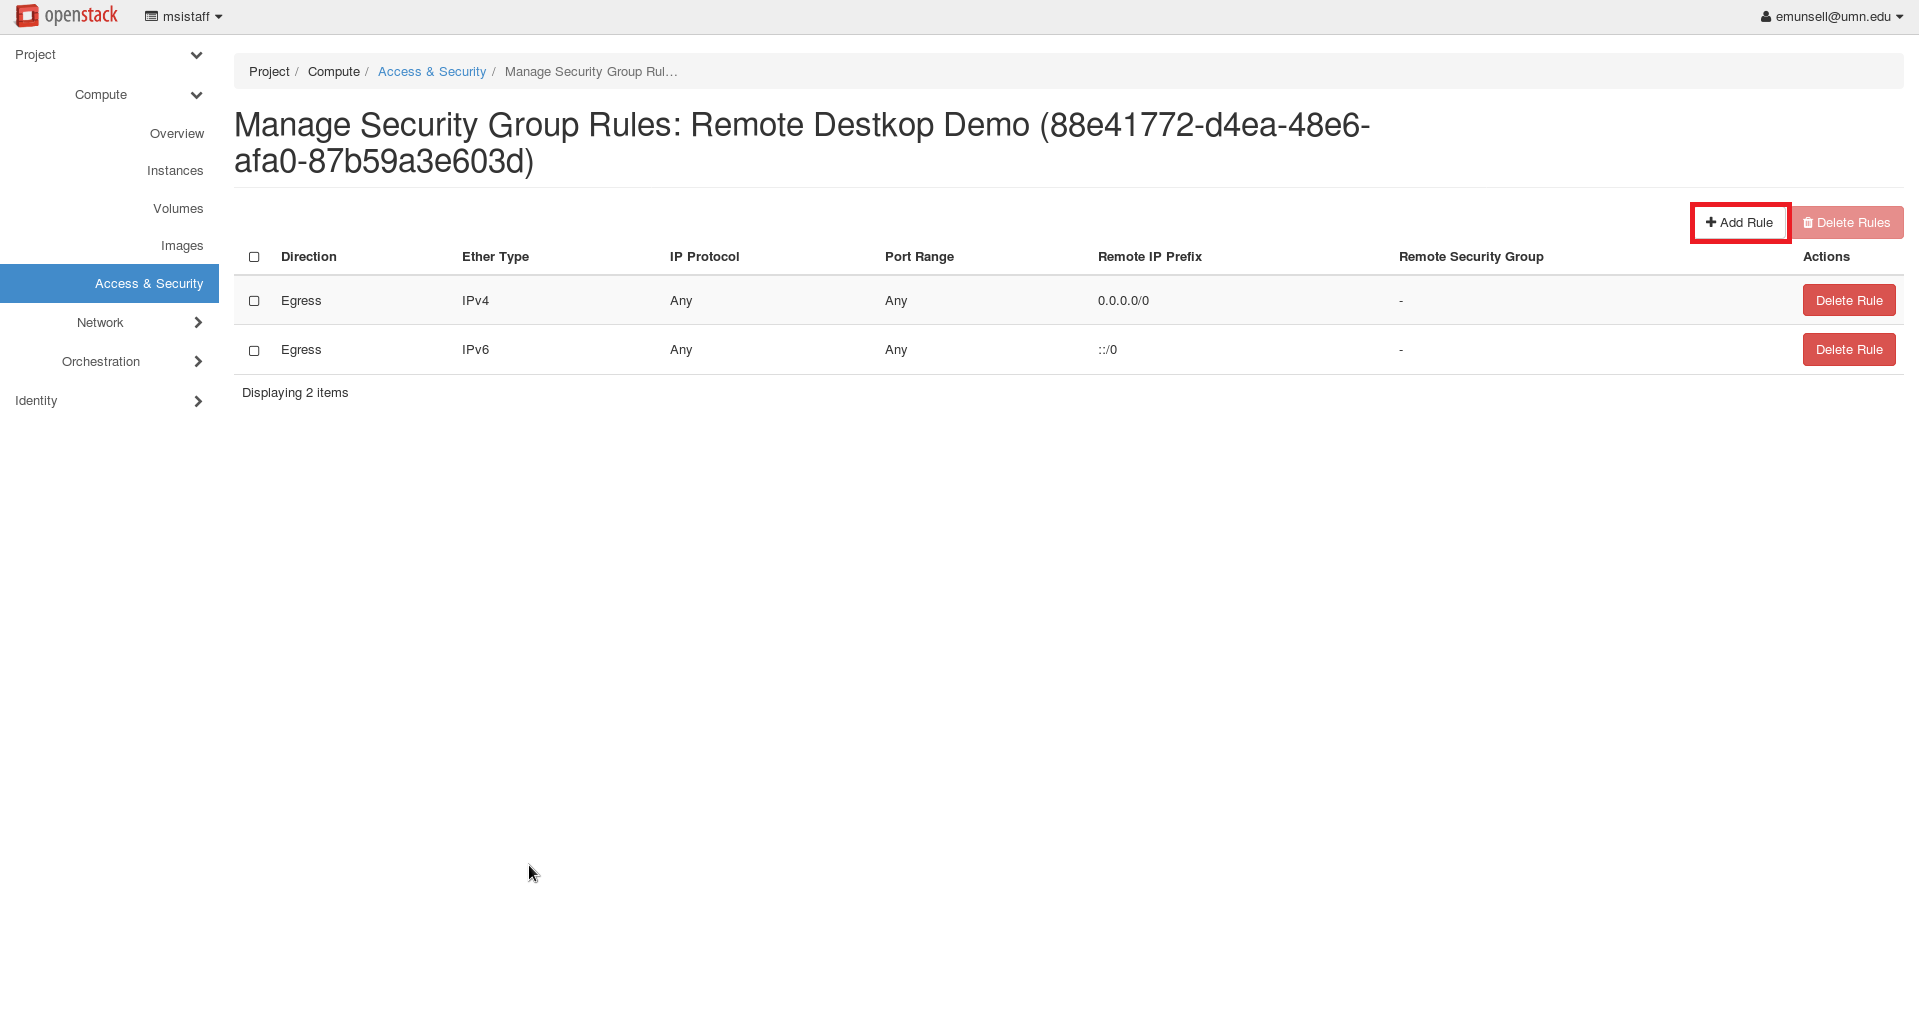
- At this point you have a new security group but it doesn't actually do anything. Now we will add a rule to allow connections. Click “Manage Rules” for the rule you just created.

- Click “Add Rule”
- In the “Port” field we will add the port we want to allow access to. There are several ports MSI allows inbound access on, which are listed below. Since this example is for remote desktop I will use that port, but you can create security groups for other services should your needs require.
Remote Desktop 3389
Secure Web/https: 443
Secure Web Alternate/alternate https: 8443
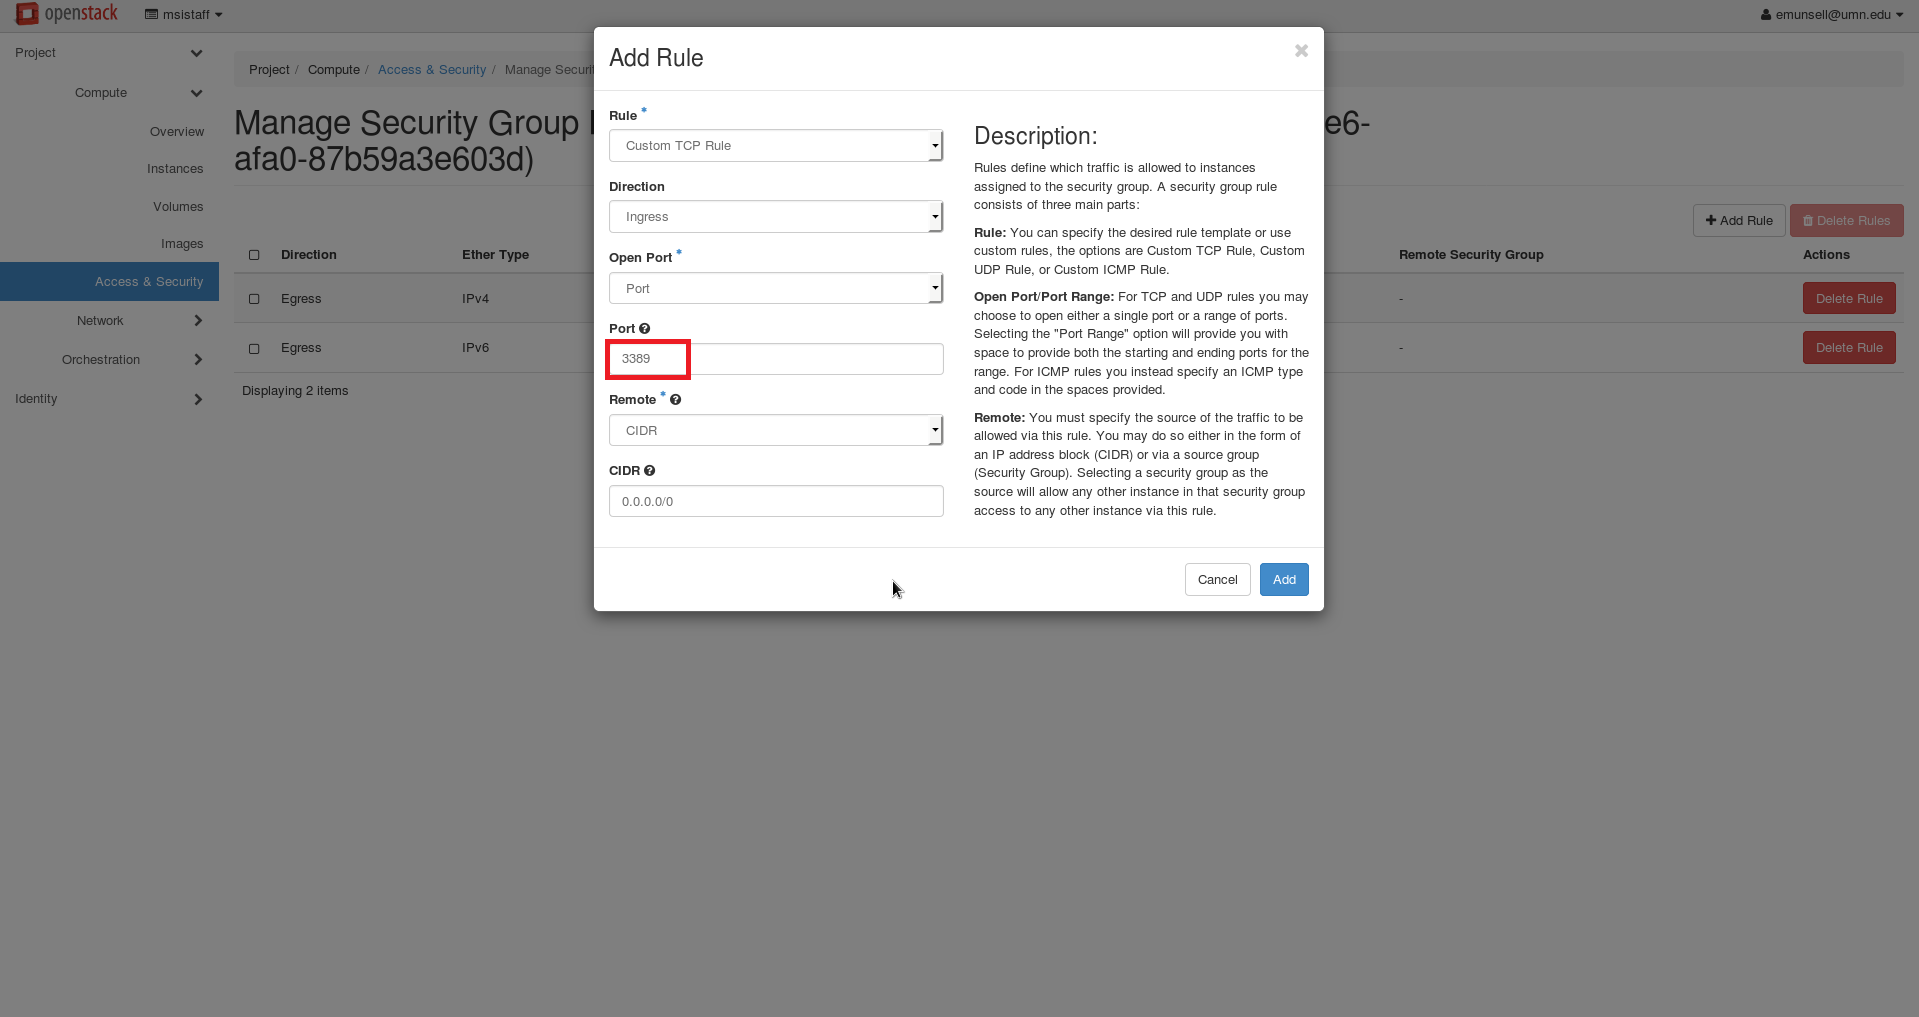
- Click “Add”

- You have successfully created your security group. Now for it to work it needs to be associated with a VM. The easiest way to do this is when you first create the VM, but it can be added after the fact. For instructions on how to added it during VM creation see this guide. To add the group after the fact see this guide